From Vue to Google Play Store – Building & Publishing a Native Android App with Quasar
Why I Built a Multiplication App with Vue & Quasar
I recently completed a rite of passage: I've published my first app in the Google Play app store. The reason for going through this was two fold: I was aware of the capacities of multiplatform builds using my favorite framework of choice and wanted to explore how this would pan out in practice. At the same time, the perfect opportunity presented itself: my kids were practicing tables of multiplication and to me, that seemed a perfect challenge to build an app for!
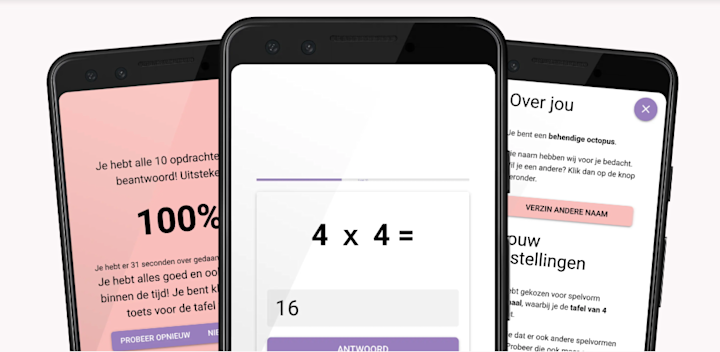
So the app I built is a learning game. You get to choose what tables you want to practice and supports different practice modes. In order to achieve this, I built several screens which allow you to configure your practice runs, do the actual practive and show you the results. Since it's built for kids, I added a bit of whimsical options and made sure that personal privacy was paramount: no data collection, no profiling, nothing.
As I said, I was aware of the cross platform capabilities, having built desktop apps before (also while wokring on my book). I never however, went through with building an app and the Play Store publishing process. I chose to use Quasar for building this, since it has first class support for cross platform builds built in.
Choosing Quasar: Vue-Powered and Mobile-Ready
My goal was not to learn the app building and publishing process, not get into new tech. So I chose to use a tech stack that I'm very familiar with: Vue and Quasar. It also helped that I built some apps with Quasar in the past, so I could easily get my bearings there.
Quasar is a framework built on vue to help with cross platform development. It's truly a build once, deploy everywhere approach. While the Nuxt developer experience (DX) is top notch, Quasar's is actually not far behind in terms of DX. It's a joy to work with. You do have to get used to small changes in the project setup though. Luckily, the documentation explains it all!
It also offers a handy library of cross platform components, so that you can quickly scaffold out a varied range of interactive screens.
Lastly, the CLI offers built in tooling for all the operations you need in order to build assets and build the package.
Building the App: From Idea to Working UI
For the project itself, I did nothing special to be honest. This was fine, and perfectly in line with what I set out to achieve. I did learn about some caveats between booting an app and running a (Nuxt based) web application, but that's expected when switching metaframeworks and everything was well documented.
If we're being completely honest: I have to admit that I first built the app as a plain SPA using just Vue. This proved valuable in early user testing. I later ported it to Quasar without much effort: moving around components isn't that big of a deal after all.
I did have a lot of fun with user testing, since my test panel were my own two kids (10 and 8 years old). They did not hold back on the comments! Together we came up with different play modes as well, which was a fun exercise. And for them, it became a bit more tangible what I do "on the laptop" all day, for a living!
Turning it into a Native Android App
Capacitor has been a standard in terms of enabling cross platform development. Quasar exposes the option of adding that build mode to your project. After that, building for Android becomes easy, with the Quasar CLI, as you can see below (excerpt from my package.json):
quasar build -m capacitor -T android -d
The resulting APK can be installed on your Android device by manually opening it from your favorite file manager. Milestone achieved! I used the APK for quick tests on my own device, which was basically the only reason for building them.
Sidenote: I had Android Studio already installed, so I'm not entirely sure whether that's a prerequisite for the builds. It's recommended to install it anyway to be able to run your native app on an emulator.
For building I relied on the CLI as much as possible. In order to be able to publish your app to the Play Store, an APK will not suffice! You need to provide a bundle of the app. This is my script for building the initial bundle:
cd src-capacitor/android && ./gradlew bundleRelease
That script stores the .aab file deep in the src-capacitor directory, but that's fine! Next is the signing process. To sign an .aab file, I used jarsigner. This is the part where I needed to do some Doc reading, Stack Overflowing, Googling and Vibe Coding. I started out with the docs on Publishing to Store by Quasar, but the APK part seems outdated at this point.
I ended up using jarsigner together with the generated key to sign the bundle. Next, I was ready for the Play Store.
Or so I thought!
Publishing to Google Play: The Full Process
Man, this was the difficult step! Obviously I was blissfully unaware of all the hoops you have to jump through to get an app published in the store! In hindsight: building something for children meant stricter checks as well, so I added a bit of a challenge there, inadvertently.
Creating a Google Play developer account was simple enough. I opted to just release for Android, simply because publishing to the Google Play store was about € 30, while for an Apple developer account you'd have to fork over € 100. That was a bit too much for my learning goal. I'm sure that the Apple process and Google processes are in many ways overlapping, so I'm fine with this blind spot.
Next step was preparing and creating assets for the Play Store. There are clear guidelines here, so you know exactly what's expected of you. My only trouble was being able to generate the screenshots at the right resolution, since I was using the browser as my screenshot generator. Fiddling with the settings in the DevTools emulator in combination with an image upscaler got things the way I wanted with relative ease. Again, I wasn't really that interested in creating assets and for a more professional approach I'd probably spent a bit more time in imaging software the create commercially seductive images for the app.
I did spent some extra effort in the descriptive texts, since I did want to measure or verify how and when an app would show up in the listing. I wasn't aware of the term App Store Optimization (ASO), before I started this. There's a whole (inaccurate) science behind this! I limited myself with my own experience in Search Engine Optimization (SEO) and went for accurate and descriptive texts with some search terms sprinkled in. Not sure how this performs to this date! 😅
At this point, I also launched a website to accompany the app. I vaguely remembered that this was a prerequisite in earlier app publishing days, so I built it during the app development process as well. It's a small scale website, built on Vue, Nuxt with the Nuxt Content module (I'll have to do a write up for that one as well: it's a bliss to work with!). Via the website I started to collect email addresses for app testing purposes. At an early stage I already got the memo that you need to have at least a handful of testers ready. Apart from that requirement, I was also a bit curious on other peoples' experiences and opinions. By sharing the link to the signup form with coworkers, friend and family, I was able to collect a bunch of testers. Hooray!
Google Console Walkthrough (spoilers!)
Now it was time to dive into the Play Console. This is where the bureaucracy happens!
First, I created the app listing by filling out the usual info: title, descriptions, category, contact email, and of course a privacy policy. There are plenty of tools that can help you in generating this content as well. I came prepared for this step!
Next was creating a release. I followed the required steps here. I was expecting that there is a vetting process, so I was well aware that publishing isn't done in a day. By requirements, you start with a Closed Testing track. I added my band of testers. That part went pretty smoothly, save for a minor hiccup.
I wanted to test a paid app. Here's the rub: I already listed the app as a paid app in the Developer Console. After doing that, you cannot make it a free app and change it back to a paid app. Once it's free, it's free forever! This meant that I had to work with discount codes, updated pricing models and whatnot, which I could've sidestepped (I think) if I'd started out with a free app and just before publishing made it a paid app. 🤦♂️
While my testers were initially excited to be part of this exclusive group, it turns out that following through with actual testing, meaning installing the app and opening it at least a couple of times, was a bit too much effort. I don't blame anyone, I did the same with the "tit for tat" services. There's a 14 day period in which 12 people need to have opted in, installed and opened your app and kept it installed for the duration. So anxiously, I was counting down the days and looking at the number of testers. After nudging and encouraging additional individuals to meet my mark, I though I was done for the next step.
I was not.
After submitting for approval, the report came in that testing was inadequate. 🫣 So now, I already strained my goodwill resources, so I turned to Google to investigate how other developers handled this. Turns out, there's an industry built around the testing requirement 😅. If you want to roll for free, you can try out posting on Reddit or using a "you test mine, I test yours" service, like Testers Community. The general premise of this approach is simple: it connects app developers in need of testing. For every tester that tests your app, it's expected to return the favor. With Testers Community it's a credits system, with Reddit it's based on gentleman's agreement. With my low cost approach, this seems ideal. I tried out both systems, but they didn't really seem to work for me, to be honest. This was where I realized the threshold of going through app installations, opting in, trying out the app, providing feedback etc. It was just too much of a hassle. Also, with both services, I wasn't getting enough testers on the timeline that I was looking for. Since I already "wasted" the first 14 days, I wanted to make some good speed at this point.
I caved in and used a paid service that guarantees a successful testing step. I used AppTesterHub for this. For a couple of Euros, the whole process of chasing people and investing my own time on random apps was made obsolete. After a day or so after submitting the testing track, I saw that the number of testers started to increase to well over the required amount.
Is it cheating? Maybe. To be fair, I didn't receive feedback on bugs during that testing period, while I am sure that there is certainly a bug or two noticeable. I can also imagine that it's quite hard, when you're a non Dutch speaker, to properly test an app that's Dutch. Anyway, it did the trick.
After the testing periode, you have to fill out a questionnaire on how you approached testing. I have been completely transparent in my answers (seeing what would happen), and the testing was approved.
After that, I filled out the required app content form, with stuff like target audience, data usage & collection (none), and ads (also none). I also listed it as an educational app, since that's what it is. I'm guessing that these trigger a slightly stricter review path, since apps aimed at children get extra scrutiny. I'm all in favor for this, and all was good, since I have been very deliberate about privacy.
Once everything was filled out, checked, and confirmed, I submitted the release for review. That took a couple of days, but eventually, it got approved and published! 🎉
What I Learned (and What I’d Do Differently)
As you can imagine, that publishing steps were definitely the most stressful and complicated! That's why I wanted to experience this, to see how much sense I could make of it. And to be clear: I'm still not entirely comfortable with the Developer Console. Coming from web development, this is another process entirely! It was a fun challenge though! I'm still very excited and impressed with what you can do with (open source) web tools and the web standards! Building stuff is still something that gives me energy: identifying a problem, coming up with a solution, building and testing it. It's empowering to be able to do all of this.
The thing that I disliked the most was the waiting period. I think, objectively, that it's good to have a slow process by design, since it theoretically prevents the app store to be overflowed with low effort and low quality apps. Given the ease of bypassing this, if you're willing to spend a couple of bucks however, seems to indicate that it's not the best method. But still. I guess I'm more of an action kinda developer. I also hate it when a CI/CD pipeline is slow, or halts for some reason. And I'm used to be able to deploy in an instant on the web.
So next time, I'd make sure to have my paid testers lined up for the initial testing track.
As I already mentioned: I'm still not 100% comfortable with de Developer Console. I do have plans to go through the process of updating the app. There are some bugfixes lined up and extra features I could cover. Once those are ready and well tested, I'll have the pleasure of trying to figure out additional updates. As far as I understand, this process is more streamlined than the initial publication (which makes sense).
Overall, I'm pleased with the result. For under € 50, I learnt a lot about the hybrid app development process. Figuring out everything by yourself isn't always the most efficient route, though. But with some perseverance you'll get there eventually.
Am I an app developer? Somewhat. I can build an deploy a basic app. I also realize there's a lot more to learn and uncover. If you're curious yourself, give it a go!
Enjoyed this article? I’m available for part-time remote work helping teams with architecture, web development (Vue/Nuxt preferred), performance and advocacy.